Can you believe we are on Row 5!? Okay, so I know the birds strike fear in many of you, but we are going to conquer that fear and become experts in paper piecing by the time we are finished. If you follow the directions exactly, watch our videos and adhere to these tips in our post, I promise you will get great results. You may make a few mistakes and use the seam ripper a few times but that’s part of learning any new quilting technique, honestly I knew what I was doing and still did this a few times.
So here we go!
Templates:
Before you even cut your templates, go through and mark on each piece that is the White background fabric a big “W”.

Each bird has the white background plus 4 different fabrics, and a couple pieces share the same fabric. To ensure I remembered this as I was cutting, I marked the templates that were fabric prints, each with 4 different color markers. So in other words, the 2 leg pieces that are the same fabric will be marked with the same color (mine are both yellow) and A2-2, A2-3 & A2-4 will all be the same color (purple) to help you remember as your cutting. I just did a little dash, but make it bigger if you need.

Small Birds Legs:
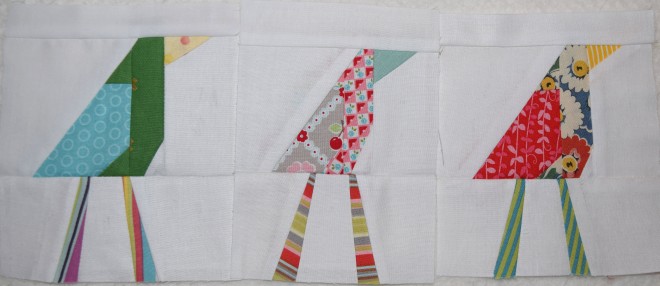
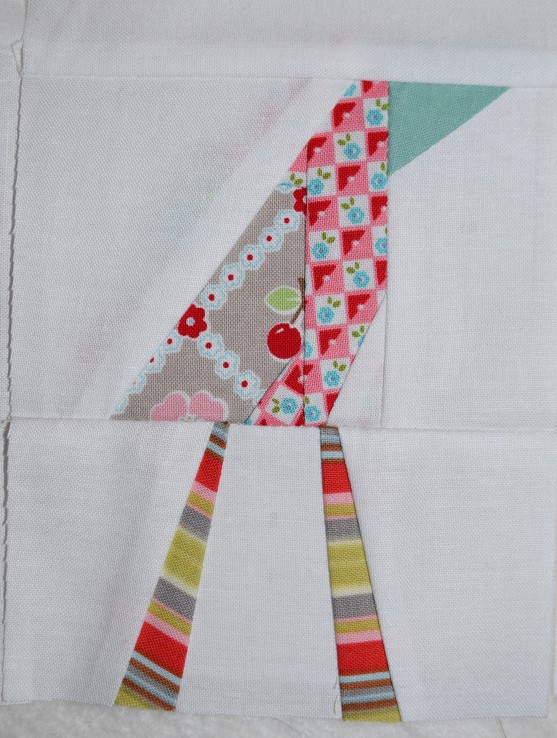
For some reason the small birds legs ended up slightly off alignment once translated to the book pattern from our original. Most of you will not notice or care. If you are a person who this bothers, there is a very easy quick fix. I tried to upload one I fixed for you all to download, but for computer reasons that I do not understand , when I upload it to a PDF, the size of the block changes slightly, which will cause you major problems. There is already a post in our Facebook Group, added by a lovely lady (Georgette) who is quilting along with us, showing a quick How to Fix for your pattern. I promise its fast and easy and I am truly sorry you have to do it. But if you don’t care, than carry on. I am keeping my birds with the little mistake, because it does not bother me, but I also appreciate those of you who want it perfect. See my imperfect small bird below to help you decide.
Cutting:
There are several tips when cutting that will help you immensely.
Cut all the pieces for all Large Birds first, than do the same for the small birds.
Cut all of your fabric pieces with a really HEFTY 1/4″ seam allowance (bigger is better here, even if your closer to 3/8″ or more, its fine, you will trim later). Also make sure you are always cutting with the template facing up, wrong side of the template touching the wrong side of the fabric as it says in the directions.
Cut all your white pieces together first, than move on to the colored fabrics. It is really key to STAY ORGANIZED. Here is what we did and it works GREAT.
Cut all pieces for each template piece for all 5 large birds and than later for all 7 small birds at the same time ( count the template pieces that are the same fabric as 1 piece, and do them together for each bird). Stack all of the fabric pieces for a a template on top of each other and than pin the template on top. See my pic below if your confused at all and it should make more sense.

These are all of my pieces for the Large Bird. Now I can easily work on them in an assembly line style.
Paper Piecing:
We highly recommend using velum for your paper piecing. It is easier to see through, you can unpick stitching from it without it breaking apart and it is easier to rip out at the end. We sell it in kits, but you can also get it online and at most paper stores, you will want a medium weight.
Start Piecing:
Follow the directions in the book and watch our videos in the Facebook Group , all of them before you start stitching and than again as you go if you need more help. We made several videos on the stitching process, that I promise will make all of the difference in the world!
Make sure to work in assembly line fashion! If you make 1 bird at a time from start to finish the row will take you FOREVER! But if you do each step, to all large birds at the same time, than the next step to all and so on (this is assembly line) it will be so much faster. Also if you work this way, you will make less mistakes, because of the repetition. Some people like to make a test bird, to make sure they know what they are doing and it works. If you want to do this, just make this 1 from start to finish and than move to assembly line sewing.

Also don’t worry if your bird looks a little crazy while you are in the middle of a section. At some points they look really weird, but it is probably correct.

Looks weird, right? But after I trim and add more sections, this is going to be perfect.
Trimming:
When trimming seams inside the section, you can trim to a scant 1/4″, with a ruler or scissors (see videos). But you MUST have a FULL 1/4″ seam on the outside edge of all sections and the finished block.
When trimming around each section that you MUST leave a 1/4″ OUTSIDE of the paper. This is your seam allowance, DO NOT TRIM UP TO THE EDGE OF THE PAPER. I did this on all of my blocks on my very first paper piecing attempt many years ago and to say I was bummed is a major understatement. But, on the bright side, it was a great way to ensure it has never happened again.
Ok, so watch the videos and get stitching. I promise you can do this! And post your pics in the usual places with the tag #row5giveaway to be entered in this month’s drawings.
