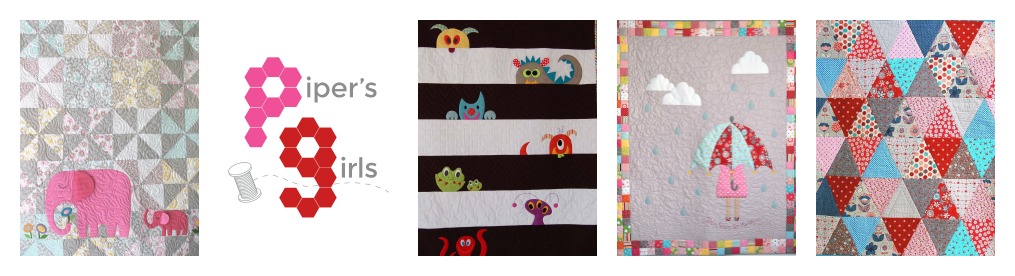
Row 3 is here and I really think you all will be pleasantly surprised while making this one. It looks really impressive and in my opinion is much simpler to make than it appears. Follow the instructions in the book exactly, pay attention to these tips in this post and also watch our videos in the Facebook Group for extra help and you should end up with a beautiful row.
Fabric:
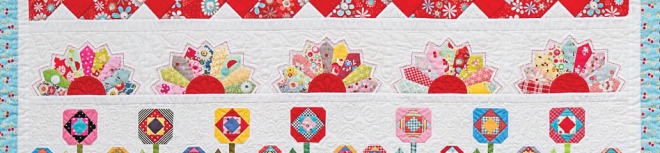
You will use 23 fabrics for the Dresden Spokes on this row, cut from Fat Quarters, Fat Eights or even scraps. You will also need a fabric for all of the center half circles, use your leftover solid red from Row#2 or a new fabric and it doesn’t necessarily need to be red ( I really wanted to use black but than chickened out at the last minute). Lastly you will use some of your background fabric.
Cutting:
Background Fabric- In the book it has you cut the backgrounds 10.5″ X 6″, this is the intended measurement and will probably require small shims of the background on the outer edges once you see where your width ends up with all rows at the end (see page 15 in the book re: shims).You could also cut these backgrounds larger than our directions, at 11″X 6″. If you do this, you will end up with trimming a little teensy bit off both ends when you are putting all of your rows together. Either way is fine, I will be using the shims technique, as I like the look of them squeezed a little closer together, but you can do either.
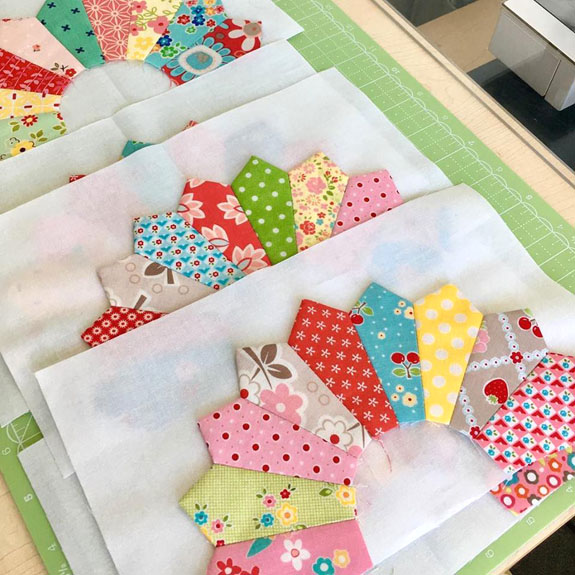
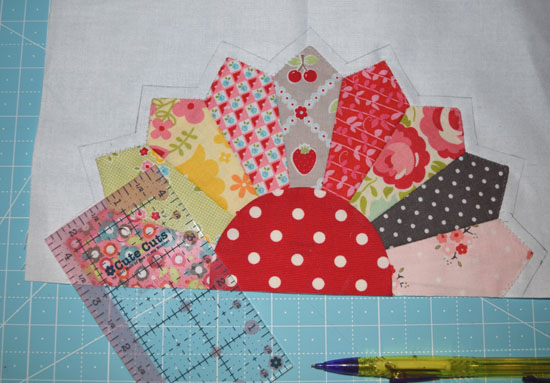
Dresden Spokes- Make a template of the Dresden Spoke #1 pattern in your book from velum or something similar (I suggest even making a few in case you cut into one as you go, than you already have a replacement). This is a silly tip but actually really helpful, use a piece of scotch tape on the back of the velum to adhere it to fabrics when you cut. The tape can be reused over and over as you cut each fabric and holds just enough to make a huge difference. Its best to cut fabrics in pairs and a small ruler is really helpful, a 1″ X 6″ or a 2.5 X 4.5″.

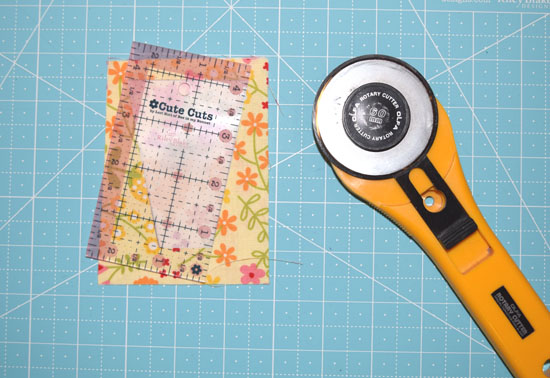

THE NEXT STEP IS THE MOST IMPORTANT STEP WHEN MAKING THIS ROW! You must trace the Dresden spoke #2 pattern onto the wrong side of all of your spokes after they are cut. It is not exactly 1/4″ in all spots, if you trace 1/4″ with your ruler or skip this step all together you will have issues getting the finished dresden to fit and lay flat correctly. This traced line is also your stitch line later. It is REALLY IMPORTANT and will make all the difference in having this row work perfectly for you. Be sure to center the pattern as best as you can each time you trace it.

Making the Dresdens:
Follow the directions on page 21 in the book, they are great with lots of pictures. There are 3 videos #1-3 in our Facebook group that will help you to turn the Dresdens right side out correctly, get perfect points and press them precisely.

Putting the Spokes together:
Follow page 22 instructions paying extra attention to the following tips.
Before you stitch your spokes together, I strongly suggest picking your fabric placement for all 5 blocks and taking a photo with your phone, or attaching a labeling system to ensure that the colors are all spread out evenly.
When pinning pairs together to stitch, make sure the top and side points are lined up perfectly. If the bottom ends are off slightly, it will not be a problem, but if your points (especially the side point) are off it will be an issue.

Next and most importantly, when stitching spokes together use your traced pencil line as your stitch line, not your 1/4″ foot. See our video #4 in the Facebook group for more assistance here.
Adding the Background:
If you follow our directions carefully, you should be able to fit a Dresden made up of 9 spokes onto a background easily. Make sure to line up your middle spoke point to the middle fold line you make in step 1. Use a basting glue to adhere all 5 to the backgrounds, do not worry if the beginning and last spoke is hanging over the background a little, this is totally fine and you can trim it after you stitch them into place. See our #5 video on the FB page for more help on glue basting your Dresden into place.
Machine Applique:
We love our favorite machine applique method for attaching the Dresdens but you can also use Hand Applique or another Machine method if you prefer. Remember, when using a mono-filament clear thread, it is only used on the top, NOT in your bobbin, just keep your regular thread down below. If you have a needle down option on your machine it is VERY helpful to keep everything in place when you have to pivot to turn up and down the points while stitching (if you do not have this option on your machine, just hand crank the needle into place and it does the same thing).
Applique Centers:
The Half circles are dynamite in red but could be any other color that you think sets off your Dresdens, I ended up switching to a polka dot last minute, just because, and I really love it. Follow the directions carefully on page 24. I suggest making 1 velum template before you make all 5 and make sure your piece covers your opening easily. If your piece seems a little too small, cut your velum template slightly outside the drawn line and this will fix this problem. There is a great little video (#6 in the FB group) that shows how the seam allowance in turned over with your awl and some glue stick.

YOU GUYS! Your pretty much done!
Optional Embroidery:
The outer red embroidery is totally optional, but I love it and think it really adds a little extra pizazz. You can also change the color to match your center if you did not use red. Someone in our FB group had black centers with black stitching and I really loved it.
I hope everyone really enjoys making this row! Also after all 5 are stitched together, remember to wait to add shims or trim, it is really best to do this to any rows where its necessary at the very end, once all rows are finished and measured. As usual we will have a giveaway for some of our favorite products we used for Row 3, you can enter in the FB Group or Instagram.


11277 Hamilton White F’17


I feel like I am late to the party! This looks so fun! I think I am going to have to run out and buy the book and join alomg❤️❤️